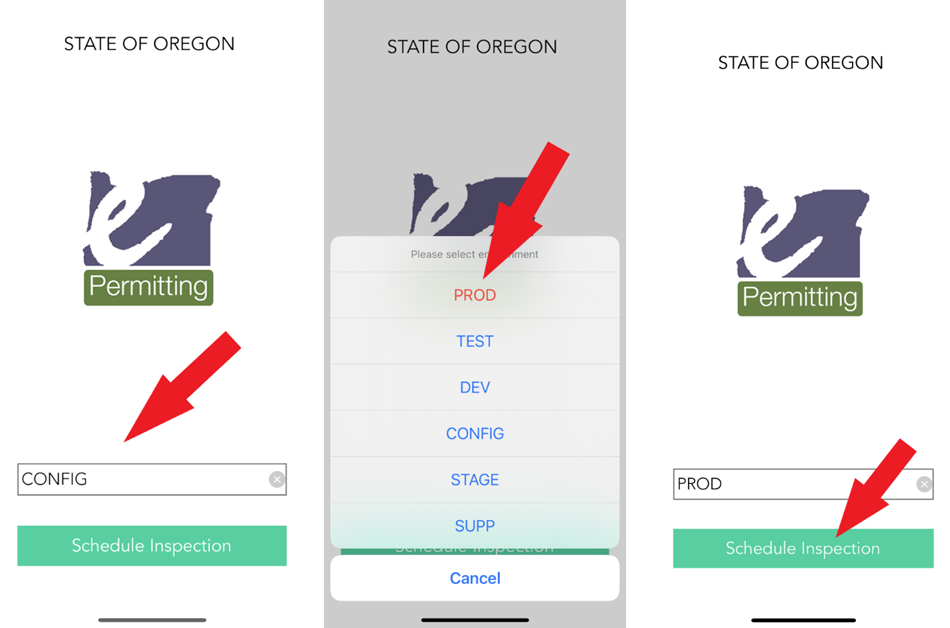
Next you will need to change the environment to
“PROD” when using the app. Touch
“Config” and then choose
“PROD” from the menu. You will ALWAYS want to choose “PROD” as this is our production environment that everything is live and active in. All other environments are not live and are only used for testing and development purposes. Then touch the Schedule Inspection button to use the app.
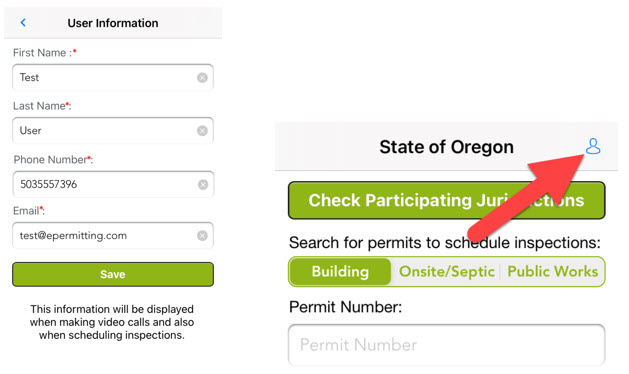
The first time you use the app, you will need to fill in
User Information. This information is required for the app to work, helps the inspector know who they are communicating with, and will auto-fill with the user information you enter when scheduling an inspection.
Note: User information can be changed later by clicking the user information icon.
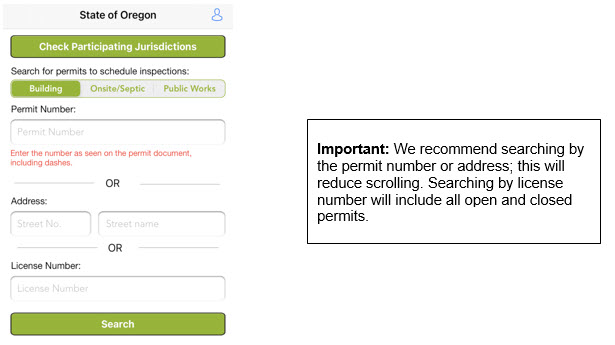
From the home screen, you can search for a permit using the Permit Number, Address, or License Number.
Important Note: During initial testing, we have experienced an issue when first opening the app where the app searches for the permit, address, or license number, then throws an error after searching. If this happens, force close the app and reopen it to try again. It may take a couple tries and then should work fine after that. We are working on this issue to identify the cause.
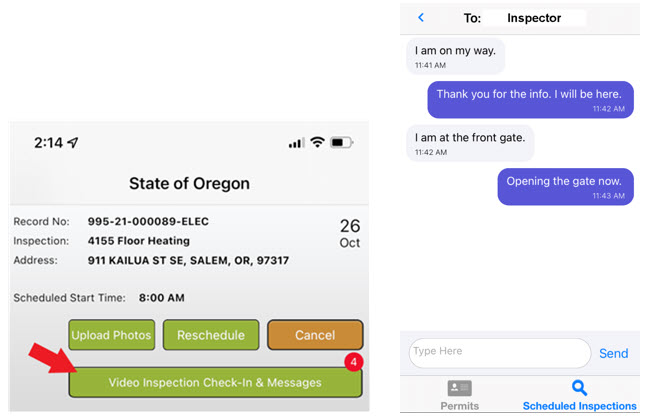
Once you have found a record, you will see options for:
Inspection History: Shows resulted and scheduled inspections.
Scheduled Inspections: Shows all scheduled inspections for the permit/record.
Schedule A New Inspection: Where a new inspection can be scheduled.

Upload Photos: When an inspector requests photos for an inspection, you can use this button to attach photos for the inspector to review.
Reschedule: If you need to request another inspection date.
Cancel: If the installation is not ready for inspection.
Video Inspection Check-In & Messages: Receive and send messages to the inspector. This is also where a video inspection will be started.

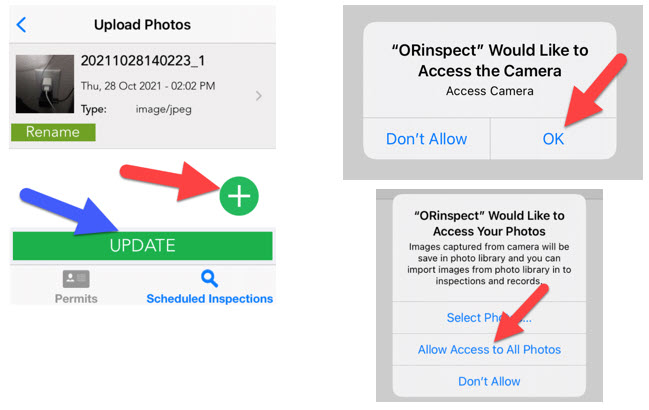
How to upload photos:
You need to be on a scheduled inspection to upload photos. If the inspector requests photos, you will receive a notification from them on the app.
- Select
Upload Photos.
- Select the green
plus icon button. You can take pictures with the app or upload pictures from your camera roll.
Please only upload from your camera roll if you don't have reception on the jobsite.
All pictures taken in the app are tagged with a GPS location, so inspectors can verify that the pictures were taken at the correct jobsite. - Select
Rename if you want to rename the pictures.
-
Swipe
left on the picture to delete the picture.
- Select
Update once all the pictures loaded so the inspector can see them.
Start a live inspection
In
Video Inspection Check-In & Messages, there is a live chat with the inspector.
You will need to have the
Video Inspection Check-In & Messages page open to chat and when the inspector is ready to start a video inspection.
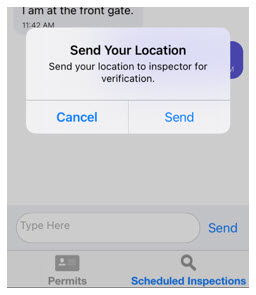
Before the video inspection, the inspector will send a location verification. This is to verify that you are at the location of the inspection.
You must be in Video Inspection Check-In & Messages
to see the verification pop up and begin the video inspection.
If this is your first video inspection, you will need to allow the app to access the camera and the microphone.
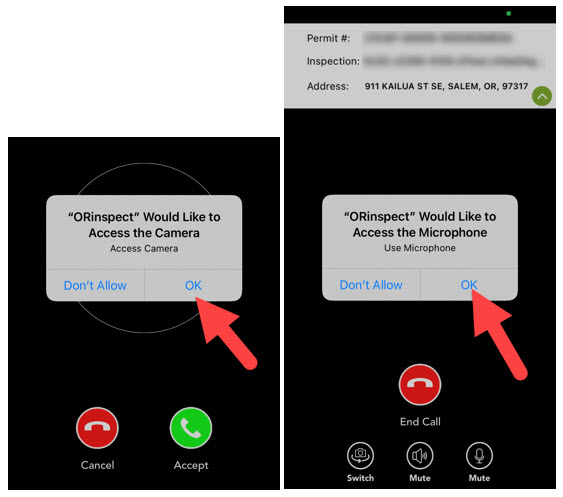
From there you and the inspector will be on a video call. The inspector will be able to take screenshots of the camera view.
Menu Overview
Queue – Any photos uploaded from the app will go into the queue. If you have cell service, they will process and submit immediately. If you are in poor service or have no service, they will remain in the queue and will be sent when service is reestablished.
Notifications – Notifications will be sent to your device via the App. In order for notifications to work, you MUST first search for the permit number or address of the permit from the App. For example, a contractor pulls a new permit, then must search for that permit number or address in order to register it on the app and receive notifications. Notifications will auto-delete after 7 days.
Help – (STILL IN DEVELOPMENT) This will take you to an external link with contact information and training resources for the app. This page is currently under construction.
Documents – (STILL IN DEVELOPMENT) This page is currently under construction, with the intent of providing instructional documents as well as fillable forms for Moisture Content or other required information needed by the local jurisdiction.

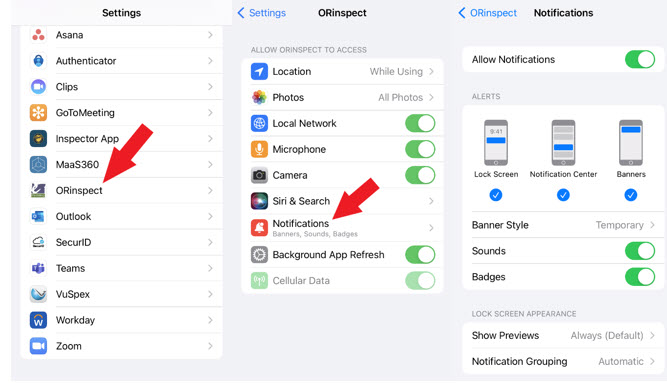
Turning Off Notifications (NOT RECOMMENDED)
Notifications can be turned off on any device you use, but if they are turned off you will NOT receive any notifications from the inspector with updates or when the inspection is resulted. Turning off notifications is NOT recommended. To turn off notifications go to your device settings and access the Apps section. From there scroll until you see the
Oregon ePermitting App icon and select it. From there you can choose notifications to turn them off or modify the icon badges.