Reference data is separate from transactional data in that it has to only be input or loaded once and then used, or referenced when associated to new applications/records (reference pages include Address, Parcel, Owner, Licensed Professional, and Contacts), where transactional data is specific only to the one individual record it was associated to, once pulled into the record from reference. Reference data becomes transactional once it is associated to an individual record when selecting it from reference Property or People pages. Once it is transactional, it is static and intended to be a snapshot in time of that address/parcel/owner (APO) or licensed professional (LP) information at the time the record was created, and is also not subject to subsequent updates made to the source information in the reference data. Once transactional, it is not updated or synched to the reference again, unless you manually do so.
Below are the steps on adding and accessing Property reference data that you will need to become familiar with these order to maintain and manage your agency's APO.
To add a new APO record to Property reference data:
Do the necessary research to acquire the Address, Parcel # (map/tax lot), and Owner of record – this is required to add new APO to property reference.
Open Launchpad > Parcel page to begin. Enter the Parcel # into the Parcel # search field – select Submit. Note: a “%" can be used as a 'wildcard' in certain fields for searching making a search an 'includes,' otherwise Accela will look for an exact match. Note: get familiar with the Parcel number format that your agency is using (i.e.. are they using alpha-numeric, deliberate spaces in between numbers, etc.) in order to perform a thorough, accurate search.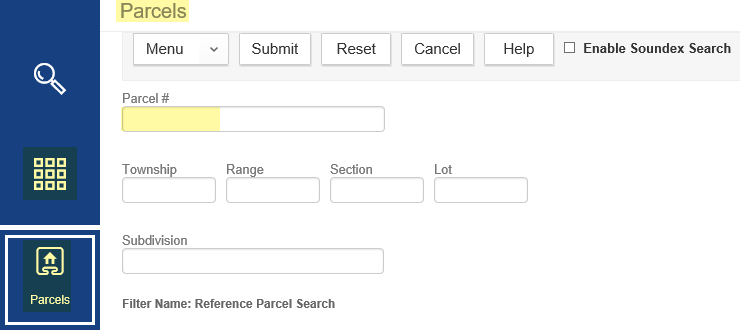
0 matches will be found if the parcel does not already exist in the Property reference data – 0 record(s) found. Next, select NEW to create a new parcel through the Parcels page – this is the best practice method for creating new APO records in your reference data. Enter the Parcel # to the Parcel Detail Tab, confirm the Parcel Status = Enabled and that Primary = Yes, and you can optionally input a Lot number, a Subdivision, or Legal Description if helpful or needed – as well as filling in any local custom parcel attributes that your agency might require. Submit to save the new parcel.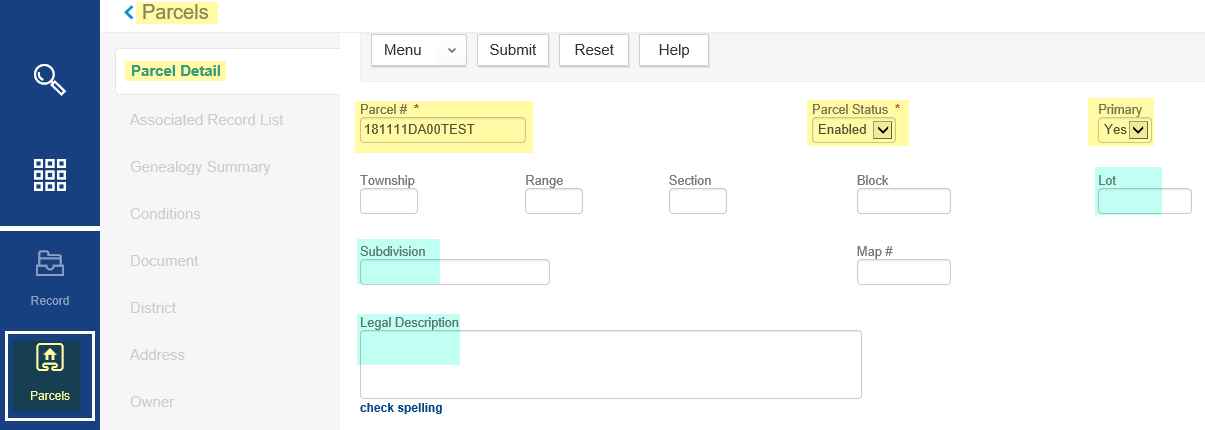
Example of local custom parcel attributes: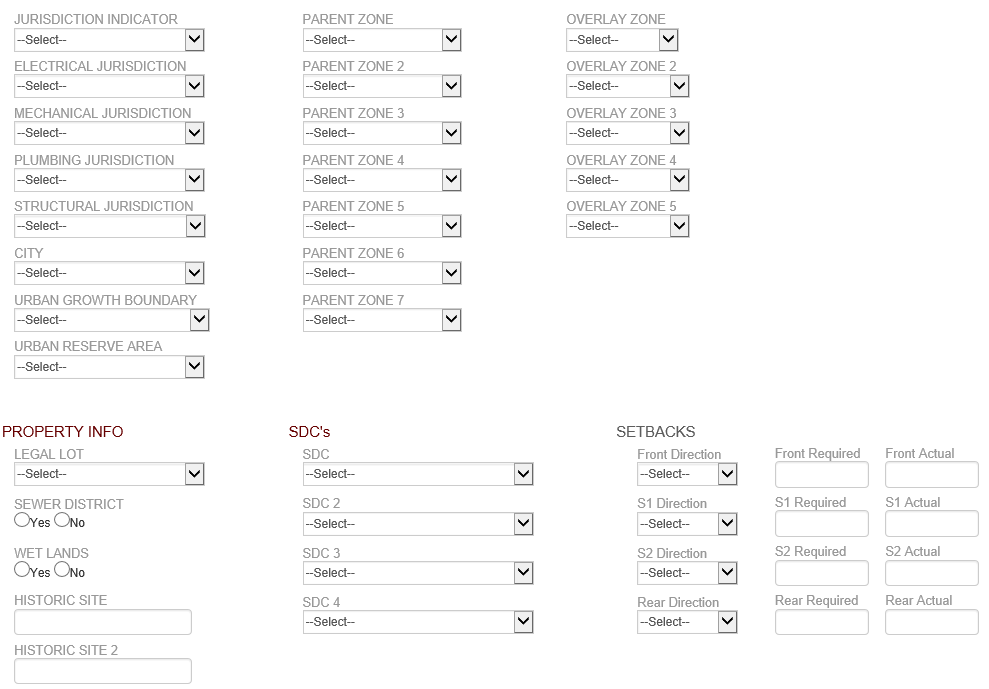
Important Note: If a match for the Parcel # is found initially, then the parcel is already included in the Property reference data and you must only complete or update the Parcel Detail tabs as indicated in the below steps.
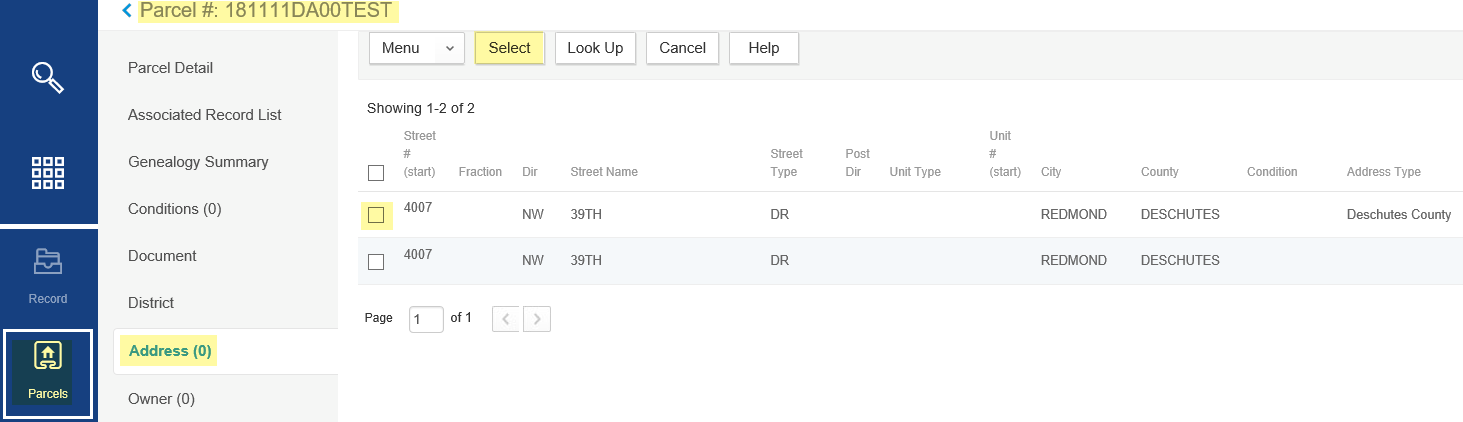
Once saved, select the Address tab in the Parcel page tabbed window. Once on the Address tab, select Look Up to first search for the address (enter Street # and Street Name only) that should be associated to the parcel number you have just added – Submit to search.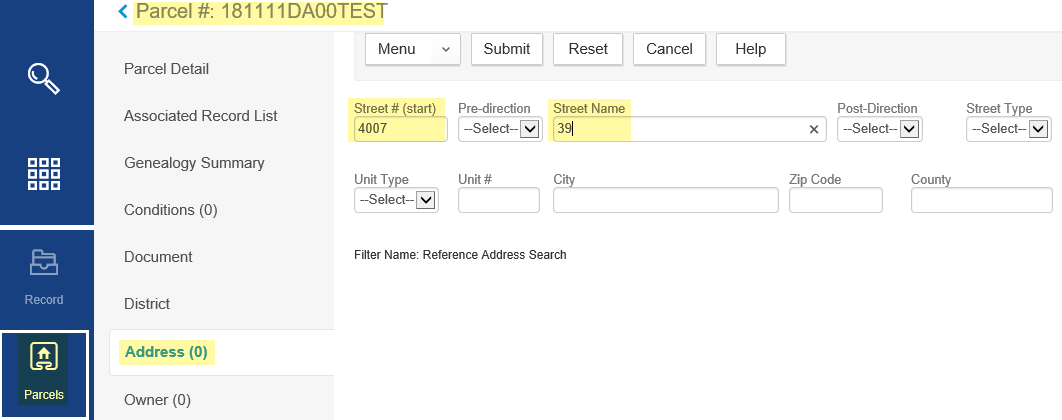
If a matching address is found, select the checkbox next to it and click Select to attach it to your new parcel. If no matching address is found, select NEW – fill in the address information in full, then select Submit to save the new address you just created.
Creating a NEW address on a parcel, making sure to set Primary = Yes. Also, making sure to fill in any other locally required address details, such as County – do not fill in Inspection District on the Address, inspection districts are managed on the Parcel.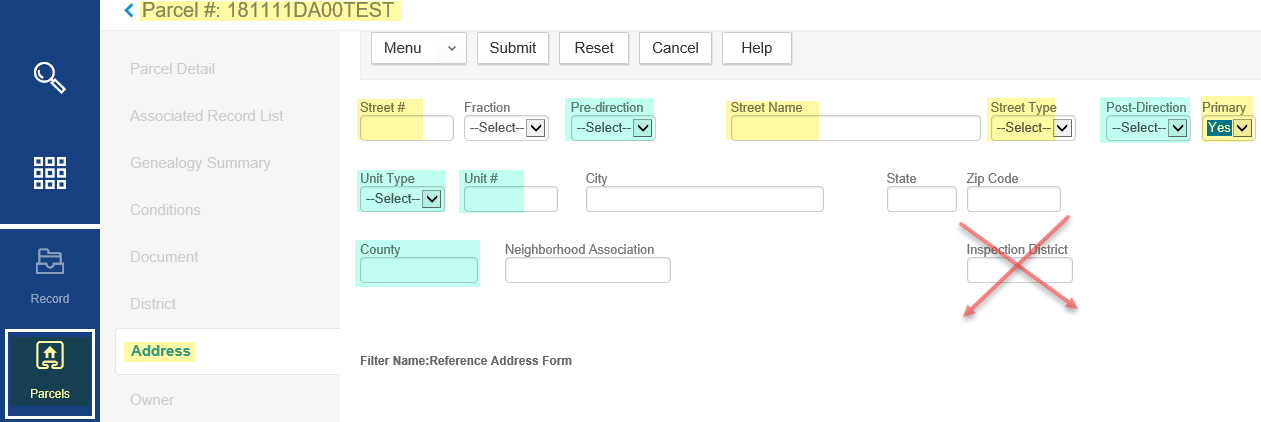
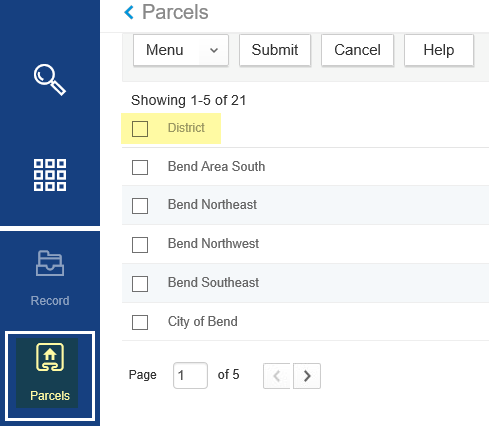
Important Note on Inspection District: If your jurisdiction uses inspections districts, make sure to select the District tab in the Parcel tabbed window to add the necessary Inspection District for this parcel. Simply select Search, and the pre-defined inspection district(s) should be listed there, check the checkbox for the inspection district appropriate to this parcel and Submit to save your selection. Inspection Districts affect inspection calendars, i.e.. which days and times are offered to the requestor - and/or - which inspector is auto-assigned (for those agencies electing to use auto-assign by district), i.e.. Joe performs inspections in Bend Area South district and Tim performs inspections in Bend Northwest district.
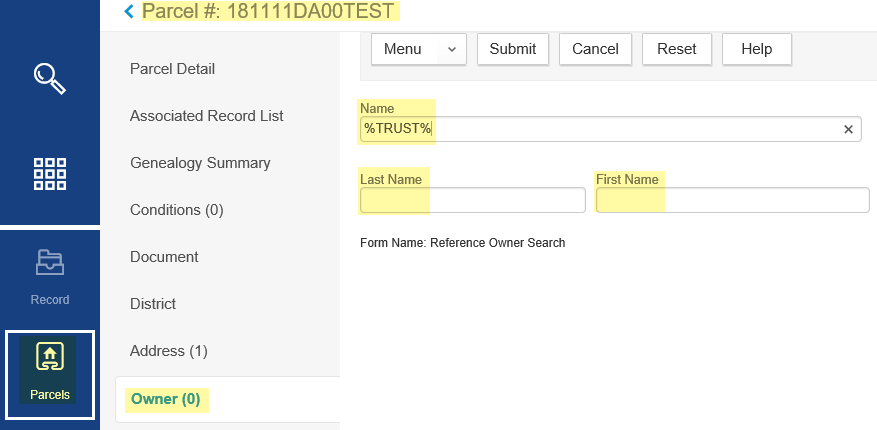
Select the Owner tab in the Parcel page tabbed window and proceed to generally follow the above steps 4 and 5 for adding/associating Owner information. Look Up, NEW (fill in all the required fields appropriate for your agency, in your agency's standard format) or select, Submit to save your work and to associate an Owner to your new parcel. Note, you can add multiple owners to a given parcel, as appropriate.
The Name field in the Owner Look Up is typically for business/organization names such the case with trusts, for instance – use the % symbol around your search word - i.e. %TRUST% - to do a partial search of all owner names containing the word “TRUST" in their name. The Last Name and First Name fields are typically for searching individual names of owner people. Important Note on successfully searching Owner reference data: the format of the information is highly dependent on how information was provided in your agency's APO data load that is provided to ePermitting, for example some agencies send over married couple names together in the Name field, such as “SMITH THOMAS & IRMA", while other agencies might use the first and last name fields, in this case where there are two individual names indicated. Make yourself familiar with how your agency indicates owner name information in the reference data that is provided for your agency.
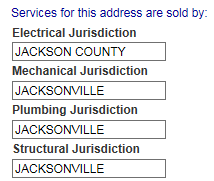
IF YOU ARE A COUNTY JURISDICTION > return to the Parcel Detail tab in the Parcel page tabbed window and scroll down to see if there are Service Jurisdiction dropdown fields displayed for Electrical Jurisdiction, Mechanical Jurisdiction, Plumbing Jurisdiction, Structural Jurisdiction, and Sanitation Jurisdiction service jurisdictions. If these are indicated – this means your jurisdiction shares some addresses with another service jurisdiction where you both participate in ePermitting and you both provide separate services to the same address – this address might exist in both jurisdictions where, for example, the City provides all building services except Electrical where the County provides the Electrical service.
If this is the case, select the appropriate jurisdiction name in these fields and Save to save your selections. This will determine which services (application types) are offered and as provided by which jurisdiction for a given address on ACA.
In this example – Jackson County and the City of Jacksonville both offer Mechanical, Plumbing, and Structural services in general – but for this particular address, they both provide different services – Jackson County provides the Electrical while Jacksonville provides the other services. For customers applying on ACA, when they input this address – they need to see that Electrical Permits are made to Jackson County and other services are made to Jacksonville. ONLY COUNTIES need to designate service jurisdictions.
DON'T FORGET! Completing this step is REQUIRED in order to allow customers to apply online (on ACA) for permits on the address. Now go to Launchpad > Address page, and the address search fields will display – enter the NEW address you have just added to your NEW parcel and select Submit to search for this new address. The address you just added should be returned as a result (if more than one result is returned matching your search, make sure to select the one you just added). Click the Street # to open this address. Then click the Address Type tab, select Look Up – enter nothing – then click Select. Your jurisdiction name should be automatically returned - check the box in front of it and select Submit. Once you have completed the Parcel Detail, Parcel Address, Parcel Owner, and potentially Parcel District (if required) tabs - as well as have added the Address Type to the new address in the Address reference directly (if the address should be made available for online permitting) – you are now done adding a new APO record to your Property reference data
Using a Temporary Address record in APO
A temporary address is specifically used as a placeholder for the Address requirement at intake in the Building Module when a permanent address is not yet assigned/available. Best practice is that ONE temporary address is created for the jurisdiction and used repeatedly when an incoming application does not yet have an address assigned - or the type of project such as a traffic signal or fire hydrant - is indicated in an area that will likely never be permanently addressed such as in the Right-of-Way. Then this one temporary address is monitored regularly thru the Reference Address page, and removed/replaced AT THE RECORD LEVEL TRANSACTIONALLY once a permanent address is assigned and available, it is not 'removed' (inactivated) from Reference Address as it will likely have many records associated to it at any given point in time.
The temporary address does NOT have a parcel or owner associated to it as with permanent addresses, as that information would change from record to record as the temporary is needed. When using the temporary address, it is associated separately at intake in the Address section of the application – and when that is the case, the actual Parcel and Owner are also added separately thru the intake form by searching those sections individually.
The temporary address also would NOT have an Address Type indicated unless you wanted it to be available for use thru ACA – but an online applicant would have to know the temporary address in order to search to it for application purposes – this is generally not recommended. Additionally, the temporary address would NOT have an Inspection District indicated since Inspection District is defined on the parcel and not on the address. The parcel used for application in this case would foreseeably be a valid existing parcel and owner.
A jurisdiction could elect to add an additional temporary address, i.e. 123 ROW Street or 123 HYDRANT Street, if desired, for those assets/properties that will never be permanently addressed – so that those can be distinctly tracked from others.
Temporary or 'named' parcels are also available for use in the Planning and Public Works modules where parcel is required at application (different than address is for Building) – see the Temporary Parcels training document for more information on this option if your agency is using these added modules.